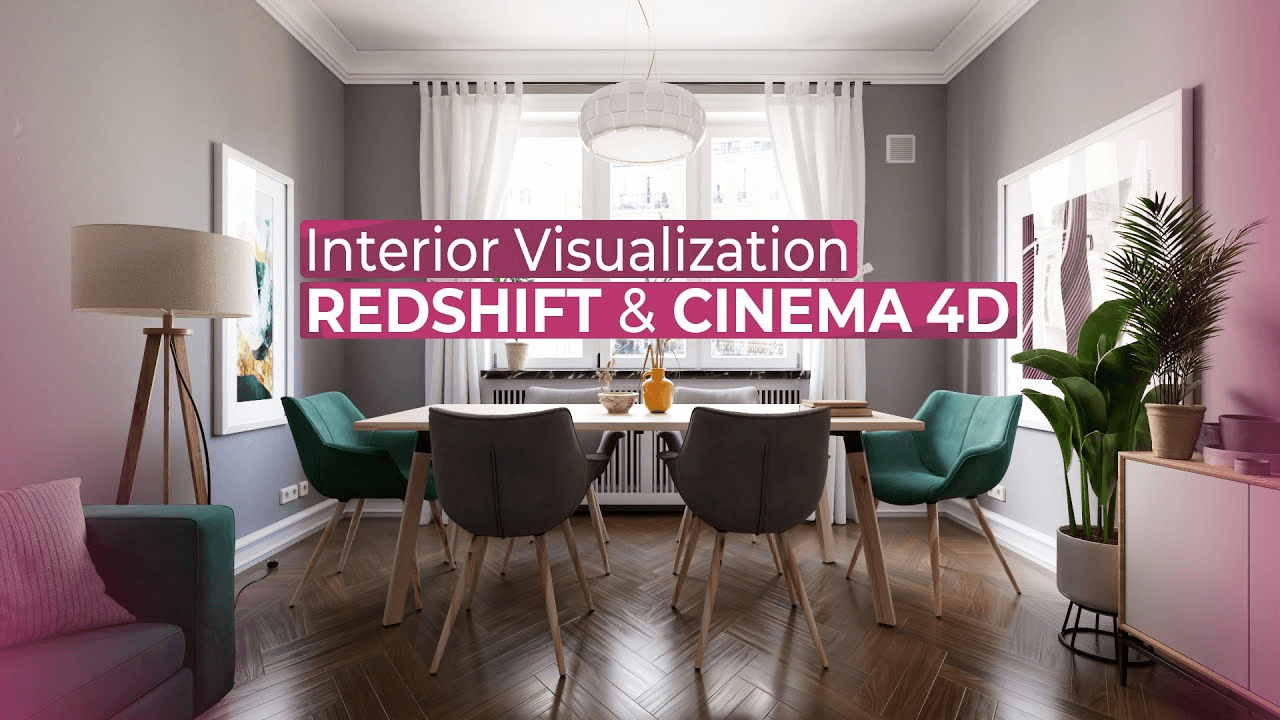
Mographplus Redshift室内场景渲染课Introduction to Interior Visualization with Redshift and Cinema 4d

ou learn how to light, shade and render realistic interior scenes using Cinema 4D and Redshift.
First, you learn how to work with references and how to look at and analyze them, then we start setting up our lights and compare different lighting setups and techniques until we have the most optimized and realistic interior lighting.
Next we learn how essential it is to have a secondary lighting setup for the look dev process; this secondary lighting setup will help us to have a near real-time shader development process without having to suffer the longer render times that comes with difficult interior shots.
Not only you learn the how part of the lighting process but the why part as well, basically why we do what we do, and this would definitely help you in your own projects.
Then we start working on our shaders, we create more than 60 shaders, all kinds of materials, plaster, marble, fabric, wood, plastic, metal, paint, rubber, glass, translucent plastic, parquet, plants, leaves, soil, clay and much more ….
We also talk about more advanced shading techniques like randomizing textures, colors and materials per geometry, this technique could be very useful in complex scenes when you want to avoid repetition when applying the same material to multiple objects, or have very specific and customizable control over the colors and attributes of a set of objects that have the same material.
After we are done with the materials, we start preparing our scene for the final render, we compare the benefits of automatic and custom sampling and finally use custom sampling to setup the final render.
This is our 22nd online course here at MographPlus in the past decade, Thousands of students from around the world have participated in our courses, I invite you to join as well and learn the fundamentals of interior visualization using Cinema 4D and Redshift
So, sign in or sign up and let’s get started.
在本课程中,您将学习如何使用 Cinema 4D 和 Redshift 对逼真的室内场景进行照明、遮光和渲染。
首先,您将学习如何使用参考资料以及如何观察和分析它们,然后我们开始设置灯光,比较不同的灯光设置和技术,直到我们获得最优化、最逼真的室内灯光。
接下来,我们将了解到在外观开发过程中,辅助照明设置是多么重要;这种辅助照明设置将帮助我们实现近乎实时的着色器开发过程,而不必因为室内拍摄难度大而耗费较长的渲染时间。
你不仅能学到照明过程的方法,还能学到原因,基本上就是我们为什么要这样做,这对你自己的项目肯定有帮助。
然后,我们开始制作着色器,我们制作了 60 多种着色器,包括各种材料、石膏、大理石、织物、木材、塑料、金属、油漆、橡胶、玻璃、半透明塑料、镶木地板、植物、树叶、土壤、粘土以及更多 ….。
我们还讨论了更高级的着色技术,如根据几何体随机化纹理、颜色和材质,这种技术在复杂场景中非常有用,当你想避免在多个物体上应用相同材质时出现重复,或者对一组具有相同材质的物体的颜色和属性进行非常具体和可定制的控制。


